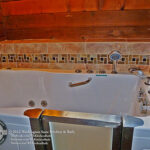
Tile grout in bathrooms often collects dirt, mildew, and stains that can dull the appearance of your tiles and impact hygiene. But cleaning grout doesn’t have to be a daunting chore. In this guide, you’ll discover practical, expert-approved techniques to restore your grout’s look and protect it from future damage. Whether your grout is white, colored, or textured, these actionable steps will help you achieve sparkling, long-lasting results with materials you can trust.
Before You Start
Cleaning tile grout involves a combination of the right materials, tools, and techniques. You’ll learn how to remove stubborn stains using natural and commercial cleaners, how to scrub without damaging grout lines, and how to seal grout afterward for lasting protection. This guide is designed for homeowners and remodelers who want a balance of inspiration and practicality, making grout cleaning a straightforward part of your bathroom maintenance or renovation routine.
⚠️ Safety First
- Wear rubber gloves to protect skin from irritation.
- Ensure proper ventilation when using vinegar or commercial cleaners.
- Avoid mixing bleach with vinegar or hydrogen peroxide to prevent toxic fumes.
- Keep cleaning products out of reach of children and pets.
🛠 What You'll Need for How To Clean Tile Grout In Bathroom
Materials
- Baking Soda — a gentle abrasive to lift stains
- White Vinegar — natural disinfectant and mold remover
- Hydrogen Peroxide (3%) — brightens grout and kills bacteria
- Grout Cleaner (commercial) — for tough, deep stains
- Grout Sealer — protects grout from moisture and stains after cleaning
- Warm Water — for mixing and rinsing
Tools
- Grout Brush or Old Toothbrush — scrubs grout lines effectively without damaging tiles
- Spray Bottle — applies cleaning solutions evenly
- Microfiber Cloths — for wiping and drying tiles
- Bucket — to mix cleaning solutions
- Rubber Gloves — protects your hands from harsh chemicals
- Grout Float — for applying sealer smoothly
Step-by-Step Instructions
Step 1 Prepare the Area and Gather Materials ~10 min
Clear the bathroom area around the tiles you’ll be cleaning. Remove any mats or personal items. Put on rubber gloves to protect your skin. Gather all cleaning materials and tools nearby for easy access.
Step 2 Mix a Cleaning Paste ~5 min
Combine 1/2 cup baking soda with enough water to form a thick paste (about 2 to 3 tablespoons). This paste will act as a gentle abrasive to lift dirt from grout.
Step 3 Apply Paste to Grout Lines ~10 min
Using your grout brush or an old toothbrush, spread the baking soda paste directly onto grout lines. Focus on stained or discolored areas for best results.
Step 4 Spray Vinegar Solution Over Paste ~5 min
Fill a spray bottle with equal parts white vinegar and warm water. Lightly spray the vinegar solution over the baking soda paste. You’ll notice bubbling as the reaction lifts grime.
💡 Pro Tip: Avoid spraying vinegar on natural stone tiles, as vinegar can etch the surface.
Step 5 Scrub Grout Lines Thoroughly ~15 min
Once bubbling subsides, scrub the grout lines with your brush using firm, circular motions. Concentrate on stubborn stains and mold-prone areas.
Step 6 Rinse and Dry Tiles ~10 min
Use warm water and a microfiber cloth to rinse away residue from the grout and tiles. Dry the area thoroughly to prevent moisture buildup.
Step 7 Apply Grout Sealer for Protection ~30 min
After the grout is completely dry (wait at least 24 hours), use a grout float or small brush to apply grout sealer evenly. This step helps prevent future staining and moisture damage.
💡 Pro Tips & Expert Advice
- Test cleaning solutions on a small, inconspicuous grout area first to avoid discoloration.
- Use a steam cleaner on grout for deep cleaning without chemicals.
- Regularly wipe down grout after showers to prevent mold buildup.
- For very stubborn stains, a commercial grout cleaner or oxygen bleach can be used following manufacturer instructions.
- Seal grout annually to maintain its appearance and durability.
Frequently Asked Questions
- Can I use bleach to clean bathroom grout?
- Bleach can remove stains but may weaken grout over time and discolor colored grout. Use it sparingly and rinse thoroughly.
- How often should I clean bathroom grout?
- Cleaning grout every 1–3 months helps prevent buildup and mold growth, depending on bathroom usage.
- Will sealing grout prevent mold?
- Sealing grout creates a moisture barrier that reduces mold growth but doesn’t eliminate the need for regular cleaning.
- Is vinegar safe for all tile types?
- Vinegar is acidic and should be avoided on natural stone tiles like marble or travertine, as it can cause damage.
- Can I clean grout without scrubbing?
- Steam cleaners can reduce scrubbing, but some manual effort is usually needed for deep stains.
Cleaning tile grout in your bathroom is a simple yet impactful way to refresh your space and maintain hygiene. By following these practical steps and using the right materials, you can restore grout to its original brightness and protect it from future damage. Regular upkeep not only extends the life of your grout but also enhances the overall aesthetic of your bathroom, making it feel cleaner and more inviting. With a little effort, you’ll enjoy a beautifully maintained bathroom that reflects your care and style.
Installation References
Use these topic-specific sources to verify materials, prep, and installation decisions.
Research-Backed Planning Notes
- National Kitchen & Bath Association: Kitchen planning context for layout and finish decisions. Use this source to verify materials and sequence before publishing. Source: National Kitchen & Bath Association
- Backsplash surface prep matters: Substrate prep and installation method are core tile planning variables. Use this source to verify materials and sequence before publishing. Source: Backsplash surface prep matters
On Architecture Adrenaline
- How To Increase Natural Light In Your Home: Read the full guide
Authoritative Planning References
- Tile Council of North America - Industry reference point for tile installation methods and standards.
- Custom Building Products - Manufacturer guidance for adhesives, grout, and surface prep.
External Installation References
Extra Visual Inspiration