Cracked bathroom tile grout isn’t just unsightly—it can lead to water damage, mold growth, and costly repairs if left unattended. Luckily, repairing grout cracks is a manageable DIY project that can save you money and extend the life of your tiles. In this guide, you’ll learn exactly how to repair cracked bathroom tile grout with clear, actionable steps. Whether you’re tackling a small patch or a larger area, you’ll gain confidence using the right materials and tools to achieve professional results.
Before You Start
Repairing cracked grout involves removing the damaged sections, cleaning the area thoroughly, and applying fresh grout that matches your existing color. The process typically takes around 4 hours for an average bathroom and costs between $100 and $300, depending on the size and materials. This guide breaks down each step—from preparation to finishing touches—ensuring a durable repair that blends seamlessly with your tilework. You’ll also find expert tips to avoid common mistakes and keep your bathroom looking pristine.
⚠️ Safety First
- Wear protective gloves and eyewear during grout removal to prevent injury.
- Ensure adequate ventilation when using grout and sealers to avoid inhaling fumes.
- Keep tools away from children and pets during use.
- Dispose of old grout and cleaning materials responsibly.
🛠 What You'll Need for How To Repair Cracked Bathroom Tile Grout
Materials
- Grout (sanded or unsanded) — matches existing grout and fills cracks
- Grout sealer — protects grout from moisture and stains
- Cleaning solution (mild detergent or vinegar mixture) — removes dirt and mildew before repair
- Water — for mixing grout and cleaning tools
- Masking tape — protects surrounding tiles during application
Tools
- Grout removal tool or oscillating multi-tool — safely removes cracked grout
- Grout float — applies grout evenly into joints
- Sponge — cleans excess grout from tile surfaces
- Bucket — for mixing grout
- Utility knife — trims edges and cleans grout lines
- Protective gloves — prevents skin irritation
Step-by-Step Instructions
Step 1 Inspect and Identify Damaged Grout ~30 min
Begin by thoroughly examining your bathroom tiles to locate all cracked or crumbling grout lines. Use a flashlight if necessary to spot hairline cracks. Mark damaged areas with masking tape to keep track of spots needing repair.
💡 Pro Tip: Check grout condition around high-moisture zones like shower corners where damage is common.
Step 2 Remove Damaged Grout ~60 min
Using a grout removal tool or an oscillating multi-tool fitted with a grout removal blade, carefully remove the cracked grout to a depth of about 3-5 mm (1/8 to 1/4 inch). Avoid damaging the tile edges during this process.
💡 Pro Tip: Work slowly and wear protective gloves and eyewear to avoid injury from dust and debris.
Step 3 Clean the Grout Lines ~30 min
Clean out the grout lines with a small brush and a mild detergent or vinegar solution to remove dust, mold, and mildew. Rinse with water and allow the area to dry completely before proceeding.
💡 Pro Tip: Ensure grout lines are fully dry to promote proper adhesion of new grout.
Step 4 Mix New Grout ~20 min
Prepare the grout according to the manufacturer’s instructions, mixing it to a thick, peanut-butter-like consistency. Use sanded grout for joints wider than 1/8 inch and unsanded grout for narrower joints.
💡 Pro Tip: Mix small batches to prevent drying out before application.
Step 5 Apply New Grout ~45 min
Using a grout float, press the grout firmly into the cleaned grout lines at a 45-degree angle. Work in small sections to ensure full coverage and prevent grout from drying out prematurely.
💡 Pro Tip: Remove excess grout from tile surfaces immediately using the edge of the float.
Step 6 Clean Excess Grout and Shape Lines ~30 min
After the grout begins to set (about 15-20 minutes), gently wipe tile surfaces with a damp sponge to remove grout haze. Shape grout lines smoothly with the sponge or a grout finishing tool.
💡 Pro Tip: Rinse sponge frequently and avoid over-wetting grout lines to prevent weakening.
Step 7 Allow Grout to Cure and Seal ~45 min
Let the grout cure for 24-72 hours depending on product instructions. Once fully cured, apply a grout sealer with a small brush or applicator to protect against moisture and stains.
💡 Pro Tip: Reapply sealer every 1-2 years for long-lasting protection.
💡 Pro Tips & Expert Advice
- Use matching grout color to maintain a seamless look.
- Work in small sections to prevent grout from drying before smoothing.
- Maintain consistent grout depth for durability.
- Seal grout after full cure to extend lifespan and prevent stains.
- Wear gloves and a dust mask when removing grout to protect skin and lungs.
Frequently Asked Questions
- How do I know if my grout needs repair?
- If you see cracks, crumbling, discoloration, or mold growth, it’s time to repair the grout.
- Can I repair grout myself or should I hire a professional?
- Most grout repairs are DIY-friendly if you have basic tools and patience, but large or complex areas may require professional help.
- What type of grout should I use for bathroom tiles?
- Use sanded grout for joints wider than 1/8 inch and unsanded grout for narrower joints to prevent cracking.
- How long does grout take to cure?
- Grout typically cures in 24-72 hours depending on humidity and product instructions.
- Is sealing grout necessary?
- Yes, sealing grout protects it from moisture, stains, and mold, especially in wet areas like bathrooms.
- Can I use bleach to clean grout?
- Occasional use of diluted bleach is okay, but frequent use can weaken grout over time. Use mild cleaners for regular maintenance.
Repairing cracked bathroom tile grout is a practical and cost-effective way to maintain your bathroom’s appearance and protect against water damage. By following these detailed steps and using the right materials, you can achieve professional results that last. Stay proactive with regular grout inspections and sealing to extend the life of your grout and tiles. With some patience and care, you’ll restore your bathroom’s beauty and functionality in no time.
Design Deep Dives & Resources
Use these references to go deeper on layouts, materials, lighting, safety, and maintenance decisions that matter for this style.
Research-Backed Planning Notes
On Architecture Adrenaline
- How To Increase Natural Light In Your Home: Read the full guide
Authoritative Planning References
External Inspiration
Editor-Selected Amazon Finds
Use these shopping starting points to compare dimensions, weather ratings, and reviews before buying.
Dimmable LED task lighting
A practical starting point for improving visibility and mood.
Water-resistant organizer
Useful when the design also needs daily function.
Non-slip accent rug
Adds texture while keeping maintenance realistic.
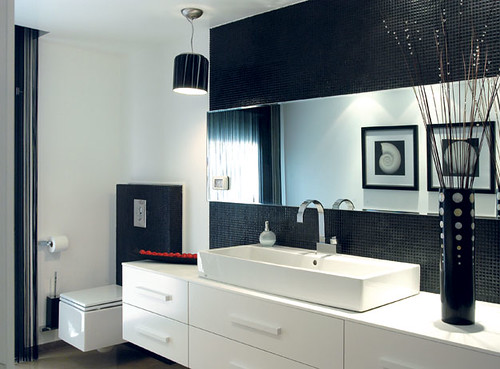
Extra Visual Inspiration