Before you begin, ensure you have the necessary tools. A toolbox with assorted screws, wrenches, and essential plumbing tools will be required.

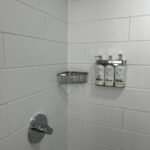
Shower valves are crucial components of your plumbing system. They control the flow and temperature of the water in your shower. By replacing old or faulty valves, you can significantly enhance water efficiency and shower performance.

1. Shut off the water supply.
2. Remove the existing shower trim kit and valve cartridge.
3. Carefully install the new valve and trim kit as per manufacturer instructions.
4. Test for leaks and ensure proper water flow and temperature adjustment.
Once you've successfully installed the new valve, consider upgrading to a rain shower head for a luxurious experience. A ceiling-mounted rain shower can transform your bathroom into a spa-like retreat.

By following these steps, you'll enjoy improved water efficiency and a smooth operating shower experience. The successful completion of this project will leave you with a satisfying sense of accomplishment!
We were experiencing no hot water from our shower which was caused by a malfunctioning shower cartridge. However issues ...
{"@context":"https://schema.org","@type":"BlogPosting","headline":"Replacing Shower Valve Tips","url":"https://www.architectureadrenaline.com/replacing-shower-valve-tips/","datePublished":"2025-05-27T04:54:40-07:00","dateModified":"2026-05-15T18:08:40-07:00","author":{"@type":"Person","name":"Matt Thompson","sameAs":["https://www.linkedin.com/in/architectureadrenaline/","https://twitter.com/archiadrenaline"]},"image":{"@type":"ImageObject","url":"https://www.architectureadrenaline.com/wp-content/uploads/2025/05/pexels-photo-20817524-450x600.jpg","width":1200,"height":630},"publisher":{"@type":"Organization","name":"Architecture Adrenaline","logo":{"@type":"ImageObject","url":"https://architectureadrenaline.com/wp-content/uploads/logo.png"}},"breadcrumb":{"@type":"BreadcrumbList","itemListElement":[{"@type":"ListItem","position":1,"name":"Home","item":"https://architectureadrenaline.com/"},{"@type":"ListItem","position":2,"name":"Replacing Shower Valve Tips","item":"https://www.architectureadrenaline.com/replacing-shower-valve-tips/"}]},"mainEntityOfPage":{"@type":"WebPage","@id":"https://www.architectureadrenaline.com/replacing-shower-valve-tips/"}}


Immerse yourself in architecture’s most boundary-pushing ideas—where innovative home improvements meet visionary urban developments. Discover new building techniques, materials, and creative concepts that are redefining how we shape our spaces on a global scale.
