Replacing your bathroom mirror with a framed version can instantly elevate your space's style and functionality. Whether you're updating an outdated mirror or adding a touch of personality, framing your mirror offers a custom look without the cost of full replacement. In this guide, you’ll find easy-to-follow steps, material suggestions, and styling tips to help you achieve a professional finish. You don’t need to be an expert to complete this project — just a bit of patience and the right tools. Let’s get started on giving your bathroom a fresh, sophisticated upgrade.
Before You Start
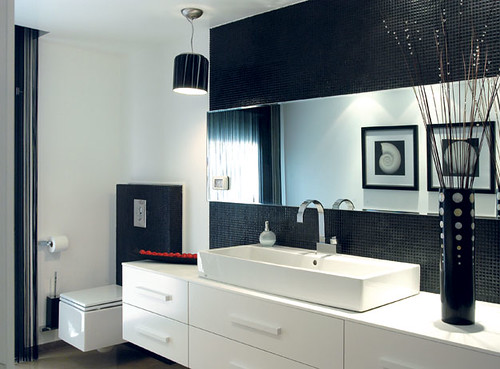
Bathroom mirrors often set the tone for the entire room. Replacing a plain mirror with a framed one adds depth, texture, and style. This project involves removing your existing mirror, selecting a frame that fits your bathroom design, and securely installing the new framed mirror. Frames can range from rustic wood to sleek metal, so choose one that complements your fixtures and color palette. Key considerations include accurate measurements, wall type, and safe handling of glass. With an estimated total time of 4 hours and a budget between $100 and $300, this update is both affordable and rewarding.
⚠️ Safety First
- Wear safety gloves and eye protection when handling glass and tools.
- Use painter’s tape on the mirror surface before removal to minimize glass shards.
- Ensure power tools are used according to manufacturer guidelines and unplugged when changing bits.
- Work with a partner to safely lift and install heavy mirrors.
🛠 What You'll Need for How To Replace Bathroom Mirror With Frame
Materials
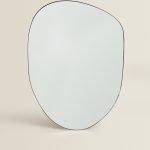
- Framed Mirror — the new centerpiece tailored to your style and size requirements
- Mirror Adhesive or Mounting Clips — to securely attach the framed mirror to the wall
- Painter’s Tape — for marking and protecting surfaces during installation
- Wall Anchors and Screws — necessary for mounting on drywall or plaster
- Level — ensures your mirror hangs straight
- Measuring Tape — for precise measurements of mirror and wall space
- Protective Gloves — to safely handle glass and sharp edges
Tools
- Utility Knife — to score and remove the existing mirror’s sealant
- Putty Knife or Pry Bar — to carefully detach the old mirror from the wall
- Drill with Appropriate Bits — for installing screws and anchors
- Stud Finder — to locate studs for secure mounting
- Caulking Gun — if adhesive is used for installation
- Soft Cloth — for cleaning the mirror and wall surface
Step-by-Step Instructions
Step 1 Measure Your Existing Mirror and Wall Space ~20 min
Use a measuring tape to record the height and width of your current mirror and available wall space. Note any obstacles such as light fixtures or switches. This ensures your new framed mirror fits perfectly and complements your bathroom layout.
💡 Pro Tip: Measure twice to avoid errors.
Step 2 Prepare the Area and Remove the Old Mirror ~45 min
Put on protective gloves. Score around the edges of the old mirror with a utility knife to cut through the sealant. Use a putty knife or pry bar gently to loosen and remove the mirror. Have a helper assist to safely lower the mirror to the floor.
💡 Pro Tip: Place painter’s tape in a grid pattern on the mirror before removal to prevent shards from falling if it breaks.
Step 3 Clean and Prep the Wall Surface ~30 min
Remove any leftover adhesive or debris with a scraper and clean the wall thoroughly. Ensure the surface is dry and smooth for the new installation.
Step 4 Locate Studs and Mark Mounting Points ~20 min
Use a stud finder to locate studs behind the wall. Mark these points with a pencil where you will install screws or anchors to support the new mirror’s weight.
Step 5 Mount the Framed Mirror ~60 min
If your mirror comes with mounting brackets, install them on the wall using screws and anchors as needed. For adhesive mounting, apply mirror adhesive evenly on the back of the frame. Press firmly against the wall and hold or tape in place for 24 hours to set.
💡 Pro Tip: Use a level at every stage to keep your mirror straight.
Step 6 Seal Edges and Touch Up ~25 min
Apply a thin bead of silicone caulk around the frame edges to prevent moisture from seeping behind. Smooth with a wet finger or caulk tool. Clean any smudges or fingerprints from the mirror and frame.
💡 Pro Tips & Expert Advice
- Choose a frame material that resists moisture, such as treated wood or aluminum, for bathroom durability.
- If mounting on tile, use a carbide-tipped drill bit to avoid cracking.
- Consider LED backlit frames for added ambiance and functionality.
- Keep a helper nearby when removing large mirrors to improve safety.
Frequently Asked Questions
- Can I frame an existing mirror without removing it?
- Yes, you can add a frame around an existing mirror using adhesive molding, but replacing with a framed mirror offers a cleaner, more durable finish.
- What type of frame material is best for bathrooms?
- Moisture-resistant materials like treated wood, metal, or PVC are ideal to prevent warping and damage.
- How do I know if my wall can support a framed mirror?
- Use a stud finder to locate studs for secure mounting. For drywall-only support, use appropriate wall anchors rated for the mirror’s weight.
- Can I install a framed mirror myself?
- Yes, with basic tools and careful preparation, most homeowners can install a framed mirror safely and effectively.
- How much does it typically cost to replace a bathroom mirror with a frame?
- Costs vary depending on frame material and size but typically range from $100 to $300 including materials and supplies.
Replacing your bathroom mirror with a framed alternative is a rewarding project that enhances both style and function. By carefully measuring, safely removing the old mirror, and selecting the right frame and mounting method, you can achieve a professional look that complements your bathroom’s design. With the right tools and materials, this intermediate-level project can be completed in about four hours, offering a fresh, personalized update to your space. Take your time, follow the steps, and enjoy the transformation!
⚠️ Disclosure: Some links in this guide are affiliate links. Architecture Adrenaline may earn a commission at no extra cost to you.
Helpful Tools and Materials
Architecture Adrenaline may earn a commission from qualifying purchases. Use this as a shopping checklist and verify sizes, colors, and compatibility before buying.
- Penetrating grout sealerThe core material for protecting grout lines from moisture and stains.
- Grout sealer applicator bottleApplies sealer directly on grout without flooding the tile face.
- Stiff grout brushHelps clean residue out of grout before sealing.
- Tile and grout cleanerUseful when the grout needs degreasing before sealer goes on.
- Nitrile glovesKeeps cleaner and sealer off your skin.
Installation References
Use these topic-specific sources to verify materials, prep, and installation decisions.
Research-Backed Planning Notes
- National Kitchen & Bath Association: Kitchen planning context for layout and finish decisions. Use this source to verify materials and sequence before publishing. Source: National Kitchen & Bath Association
- Backsplash surface prep matters: Substrate prep and installation method are core tile planning variables. Use this source to verify materials and sequence before publishing. Source: Backsplash surface prep matters
On Architecture Adrenaline
- How To Increase Natural Light In Your Home: Read the full guide
Authoritative Planning References
- Tile Council of North America - Industry reference point for tile installation methods and standards.
- Custom Building Products - Manufacturer guidance for adhesives, grout, and surface prep.
External Installation References
Extra Visual Inspiration