How To Install Kitchen Backsplash: Complete How To Install Kitchen Backsplash Guide
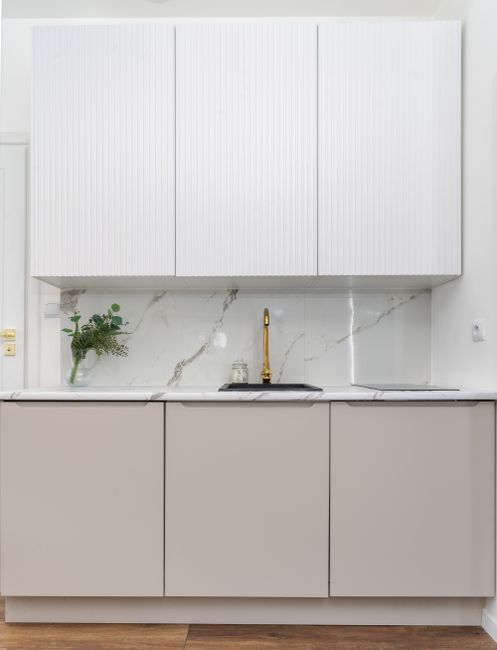
Installing a kitchen backsplash is one of the most impactful and achievable upgrades you can make to your cooking space. Not only does it protect your walls from splashes and spills, but it also offers a chance to express your personal style. In this guide, you'll learn how to install kitchen backsplash with confidence, whether you prefer classic subway tiles, vibrant mosaics, or sleek glass panels. We’ll cover everything from material selection and tools needed to step-by-step installation techniques and finishing touches.
What Is How To Install Kitchen Backsplash?
A kitchen backsplash installation involves careful preparation, precise measurements, and the right materials to ensure durability and aesthetic appeal. You'll start by selecting a backsplash material that complements your kitchen's design and lifestyle. Next, prepping the wall is crucial for adhesion and longevity. The installation process includes applying adhesive, placing tiles evenly, cutting tiles to fit, grouting, and sealing. This guide emphasizes practical tips and image-led inspiration to help you create a backsplash that looks professionally done and suits your unique style.
⚠️ Safety First
- Wear safety goggles and gloves when cutting tiles to protect eyes and hands.
- Ensure proper ventilation when working with adhesives and grout.
- Use a dust mask when sanding or cutting to avoid inhaling particles.
- Keep work area clean and free of tripping hazards.
🛠 What You'll Need for How To Install Kitchen Backsplash
Materials
- Tiles (ceramic, glass, or stone) — primary backsplash material that defines style and durability
- Tile adhesive/mastic — to securely bond tiles to the wall
- Grout — fills gaps between tiles for a finished look and water resistance
- Tile spacers — ensures even spacing between tiles
- Sealer — protects grout and tiles from stains and moisture
- Backer board (optional) — provides a smooth surface if wall is uneven or drywall is damaged
Tools
- Notched trowel — spreads adhesive evenly on the wall
- Tile cutter or wet saw — cuts tiles to fit edges and outlets
- Grout float — applies grout smoothly between tiles
- Level — ensures tiles are straight and even
- Measuring tape and pencil — for precise layout and cutting marks
- Sponge and bucket — cleans excess grout and adhesive
- Rubber gloves — protects hands during installation
- Masking tape — helps protect adjacent surfaces
Step-by-Step Instructions
Step 1Prepare the Wall Surface⏱ ~45 min
Remove any existing backsplash or wall coverings. Clean the wall thoroughly to remove grease, dust, and debris. Repair any holes or uneven areas with spackle or backer board if necessary. Ensure the surface is dry and smooth to promote tile adhesion.
💡 Pro Tip: Use a damp cloth with mild detergent to remove kitchen grease. Allow the wall to dry completely before proceeding.
Step 2Measure and Plan Your Layout⏱ ~30 min
Measure the width and height of your backsplash area. Mark a level horizontal line about 4 inches above the countertop to serve as your starting point. Lay out tiles on a flat surface to visualize pattern and spacing. Use tile spacers to determine grout lines and identify any tile cuts needed.
💡 Pro Tip: Start from the center and work outward to ensure symmetrical tile placement. Dry-fit tiles before applying adhesive.
Step 3Apply Tile Adhesive⏱ ~30 min
Using a notched trowel, spread tile adhesive evenly over a small section of the wall (about 2 square feet). Hold the trowel at a 45-degree angle to create ridges that help tiles adhere better.
💡 Pro Tip: Work in small sections to prevent adhesive from drying before tiles are applied.
Step 4Install Tiles⏱ ~60 min
Press tiles firmly into the adhesive, starting at the bottom center and working outward and upward. Use tile spacers between tiles to maintain consistent grout lines. Check periodically with a level to keep tiles straight.
💡 Pro Tip: Wipe off excess adhesive on tile surface immediately with a damp sponge to avoid hard-to-remove residue.
Step 5Cut Tiles to Fit Edges and Outlets⏱ ~45 min
Use a tile cutter or wet saw to trim tiles for corners, edges, and around outlets. Measure carefully and mark tiles before cutting. Wear safety goggles and gloves during cutting.
💡 Pro Tip: Make slow, steady cuts to avoid cracking tiles. Score ceramic tiles multiple times before snapping.
Step 6Allow Adhesive to Set⏱ ~1440 min
Let the tile adhesive dry as per manufacturer instructions, typically 24 hours, before applying grout.
Step 7Apply Grout⏱ ~45 min
Mix grout to a smooth consistency. Using a grout float, spread grout diagonally across tiles to fill gaps. Remove excess grout with the float held at a 45-degree angle.
💡 Pro Tip: Work in small sections and clean tile surfaces frequently with a damp sponge to prevent grout haze.
Step 8Seal Grout and Finish⏱ ~30 min
After grout has cured (usually 24-72 hours), apply a grout sealer to protect against stains and moisture. Wipe tiles clean and enjoy your new backsplash.
💡 Pro Tips & Expert Advice
- Choose grout color that complements or contrasts tiles for a unique look.
- Use a laser level for precise alignment on large backsplashes.
- Consider peel-and-stick tiles for a quicker, less permanent option.
- Keep extra tiles on hand for future repairs.
Frequently Asked Questions
- Q: Can I install a backsplash directly on painted drywall?
- A: Yes, but the surface must be clean, dry, and smooth. For best results, consider using a backer board if drywall is damaged or uneven.
- Q: How long does the grout need to cure before sealing?
- A: Grout typically needs 24 to 72 hours to cure before applying a sealer, depending on product instructions.
- Q: What is the best tile type for kitchen backsplashes?
- A: Ceramic and glass tiles are popular for their durability and ease of cleaning. Stone tiles offer a natural look but may require more maintenance.
- Q: Can I install backsplash tiles over existing tiles?
- A: It’s possible if the existing tiles are firmly attached and clean, but removing old tiles ensures better adhesion and a cleaner finish.
- Q: How do I handle electrical outlets when installing backsplash?
- A: Turn off power, remove outlet covers, and cut tiles to fit around outlets carefully. Replace covers after installation.
By following these practical steps and tips, you can confidently install a kitchen backsplash that enhances your space’s beauty and functionality. Whether you opt for classic subway tiles or bold mosaics, your new backsplash will protect your walls and add lasting style. Take your time with preparation and installation, and don’t hesitate to reach out to professionals if needed. Enjoy the satisfaction of a DIY project well done and a kitchen that truly reflects your personal taste.
Ready to get started?
Get a free quote from local professionals in your area.
⚠️ Disclosure: Some links in this guide are affiliate links. Architecture Adrenaline may earn a commission at no extra cost to you.
Design Deep Dives & Resources
Use these references to go deeper on layouts, materials, lighting, safety, and maintenance decisions that matter for this style.
Research-Backed Planning Notes
- Outdoor lighting should have a job: DOE frames outdoor residential lighting around aesthetics, security, and utility, with controls and shielding to reduce waste and glare. Layer low path lights, focused task lights, and shielded accent lights instead of flooding the entire patio with one harsh fixture. Source: U.S. Department of Energy
- A good landscape behaves like connected rooms: USU Extension compares landscapes to outdoor rooms with different uses, volumes, circulation paths, and water needs. Use the cover, furniture layout, pavers, screens, and planting edges to define a room rather than scattering decor around the slab. Source: Utah State University Extension
- Outdoor water use is a major design variable: EPA says residential outdoor water use in the United States is nearly 8 billion gallons per day, mainly for landscape irrigation. Use this as a reason to favor shade, mulch, targeted planting beds, permeable edges, and irrigation only where plants actually need it. Source: EPA WaterSense
- Smart watering depends on site conditions: EPA recommends matching water to plant needs and avoiding runoff; microirrigation applies water slowly and directly to roots. For patio-adjacent planting, separate sun-baked containers, shaded beds, and lawn areas into different watering zones. Source: EPA WaterSense
On Architecture Adrenaline
- 20 Kitchen Backsplash Ideas For White Cabinets: Read the full guide
- Kitchen Countertop Installation Service: Read the full guide
- Kitchen Backsplash Tile Installation Cost: Read the full guide
- Bathroom Tile Installation Guide: Read the full guide
Authoritative Planning References
- International Code Council I-Codes - Use this as a starting point for code families, then verify the code edition adopted by the local building department.
- DOE Energy Saver Lighting Design - Practical guidance for efficient indoor and outdoor lighting layers, controls, glare reduction, and fixture placement.
- Illuminating Engineering Society Standards - Professional lighting reference for terminology, visual comfort, glare, and application-specific lighting practice.
- Utah State University Extension Water-wise Landscape Design - Useful for thinking about patios and landscapes as outdoor rooms with intentional circulation, use zones, and water needs.
- National Kitchen & Bath Association - Industry reference point for kitchen and bath planning, professional standards, and remodel guidance.
External Inspiration
Editor-Selected Amazon Finds
Use these shopping starting points to compare dimensions, weather ratings, and reviews before buying.
Dimmable LED task lighting
A practical starting point for improving visibility and mood.
Water-resistant organizer
Useful when the design also needs daily function.
Non-slip accent rug
Adds texture while keeping maintenance realistic.
Extra Visual Inspiration