How To Caulk A Bathtub: Complete How To Caulk A Bathtub Guide
How To Caulk A Bathtub: Complete How To Caulk A Bathtub Guide
🎯 Beginner⏱ 2–3 Hours💰 Est. $20–$50
Caulking your bathtub is one of the simplest yet most impactful bathroom maintenance tasks you can do. Not only does it protect against water damage and mold growth, but a neat caulk line also refreshes your bathroom’s look. Whether you're tackling a remodel or just maintaining your space, this guide will walk you through how to caulk a bathtub with expert precision. You’ll learn what materials to use, how to prepare your surface, and the techniques to apply smooth, long-lasting caulk that blends seamlessly into your bathroom design.
What Is How To Caulk A Bathtub?
Properly caulking a bathtub involves cleaning and prepping the surface, selecting the right caulk, and applying it with a steady hand. The goal is a watertight seal that prevents leaks and mildew while complementing your bathroom’s style. This guide provides clear, actionable steps along with practical tips on choosing materials and tools. Whether you prefer silicone for its durability or acrylic for easier cleanup, you'll find recommendations tailored to your needs. By the end, you’ll have a beautifully sealed bathtub that stands up to daily use and adds to your home’s comfort and value.
⚠️ Safety First
Wear gloves to protect your skin from caulk chemicals and remover solvents.
Ensure good ventilation when working with silicone caulk to avoid inhaling fumes.
Use a sharp utility knife carefully to prevent cuts.
Dispose of old caulk and cleaning materials responsibly.
🛠 What You'll Need for How To Caulk A Bathtub
Materials
Silicone Caulk (100% waterproof, mold-resistant) — essential for sealing wet areas like bathtubs
Acrylic Latex Caulk with Silicone Additive — easier to tool and paintable, good for DIY
Caulk Remover — softens old caulk for easy removal
Rubbing Alcohol or Vinegar — cleans and disinfects the surface before caulking
Utility Knife or Razor Blade — removes old caulk precisely
Caulk Smoothing Tool or Finger — used to smooth and shape the bead
Gloves — protects your hands from chemicals
Bucket of Warm Soapy Water — cleans tools and surfaces
Step-by-Step Instructions
Step 1Remove Old Caulk⏱ ~45 min
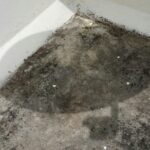
Use a utility knife or razor blade to carefully cut and scrape away old, cracked, or moldy caulk around the bathtub edges. Apply caulk remover if necessary to soften stubborn areas, then clean the residue thoroughly.
💡 Pro Tip: Work slowly to avoid scratching tub surfaces. Dispose of old caulk safely.
Step 2Clean and Dry the Surface⏱ ~30 min
Wipe down the bathtub edges with rubbing alcohol or vinegar to remove soap scum, oils, and dirt. Allow the area to dry completely — moisture can prevent new caulk from adhering properly.
💡 Pro Tip: Avoid using oil-based cleaners as they can interfere with adhesion.
Step 3Apply Painter’s Tape⏱ ~15 min
Place painter’s tape 1/8 inch away from the joint edges on both sides to create crisp, straight caulk lines. Press tape firmly to prevent caulk bleed.
💡 Pro Tip: Use a level or straight edge to align tape perfectly for a professional finish.
Step 4Cut the Caulk Tube Tip⏱ ~5 min
Cut the caulk tube nozzle at a 45-degree angle, approximately 1/8 inch from the tip to control bead size. Puncture the inner seal with a long nail or the caulking gun’s built-in puncture tool.
💡 Pro Tip: Start with a smaller opening; you can always enlarge if needed.
Step 5Apply the Caulk⏱ ~20 min
Hold the caulking gun at a 45-degree angle and apply a steady, continuous bead along the joint where the tub meets the wall or deck. Move smoothly to avoid gaps or lumps.
💡 Pro Tip: Work in manageable sections to avoid caulk skinning over before smoothing.
Step 6Smooth the Caulk Bead⏱ ~15 min
Use a caulk smoothing tool or your gloved finger dipped in warm soapy water to gently smooth and press the caulk into the joint, creating a clean, concave bead.
💡 Pro Tip: Wipe excess caulk off the tool frequently to maintain a smooth finish.
Step 7Remove Painter’s Tape and Let Cure⏱ ~5 min
Carefully peel away painter’s tape before the caulk skins over to ensure clean edges. Allow the caulk to cure fully according to manufacturer instructions, typically 24 hours, before exposing it to water.
💡 Pro Tip: Removing tape too late can cause jagged edges or pull up caulk.
💡 Pro Tips & Expert Advice
Choose 100% silicone caulk specifically labeled for bathrooms to resist mold and mildew.
Apply caulk in a warm, dry environment for best adhesion.
Practice steady hand pressure by running a bead on scrap material before tackling the tub.
Use a damp sponge to clean up any mistakes immediately before the caulk cures.
Consider repainting or retouching surrounding areas after caulking for a fresh look.
A: Typically, every 2 to 3 years or sooner if you notice cracking, peeling, or mold growth.
Q: Can I use any type of caulk in the bathroom?
A: No, always use caulk rated for bathrooms and wet areas, preferably 100% silicone or silicone blend for moisture resistance.
Q: How long does caulk take to dry before using the tub?
A: Most silicone caulks require 24 hours to fully cure before exposure to water.
Q: Can I paint over silicone caulk?
A: Silicone caulk is generally not paintable; use acrylic latex caulk with silicone additive if painting is needed.
Q: What if I make a mess while applying caulk?
A: Clean excess caulk immediately with a damp cloth or sponge before it cures for the best results.
Caulking your bathtub is a straightforward project that dramatically improves your bathroom’s waterproofing and appearance. By following these expert steps and using the right materials, you’ll create a clean, durable seal that protects against water damage and mold. Whether you’re refreshing your current bathroom or finishing a remodel, applying caulk with care and precision ensures long-lasting results. Take your time, prepare thoroughly, and enjoy the satisfaction of a professional-looking finish that keeps your bathtub pristine for years to come.
Ready to get started?
Get a free quote from local professionals in your area.
⚠️ Disclosure: Some links in this guide are affiliate links. Architecture Adrenaline may earn a commission at no extra cost to you.
Design Deep Dives & Resources
Use these references to go deeper on layouts, materials, lighting, safety, and maintenance decisions that matter for this style.
Research-Backed Planning Notes
Outdoor lighting should have a job: DOE frames outdoor residential lighting around aesthetics, security, and utility, with controls and shielding to reduce waste and glare. Layer low path lights, focused task lights, and shielded accent lights instead of flooding the entire patio with one harsh fixture.Source: U.S. Department of Energy
A good landscape behaves like connected rooms: USU Extension compares landscapes to outdoor rooms with different uses, volumes, circulation paths, and water needs. Use the cover, furniture layout, pavers, screens, and planting edges to define a room rather than scattering decor around the slab.Source: Utah State University Extension
Outdoor water use is a major design variable: EPA says residential outdoor water use in the United States is nearly 8 billion gallons per day, mainly for landscape irrigation. Use this as a reason to favor shade, mulch, targeted planting beds, permeable edges, and irrigation only where plants actually need it.Source: EPA WaterSense
Smart watering depends on site conditions: EPA recommends matching water to plant needs and avoiding runoff; microirrigation applies water slowly and directly to roots. For patio-adjacent planting, separate sun-baked containers, shaded beds, and lawn areas into different watering zones.Source: EPA WaterSense
How to Install a Freestanding Tub on a Concrete Slab: A Step-by-Step Guide:Read the full guide
Tub Inside Shower: Stylish and Functional Bathroom Design:Read the full guide
Waterproof Window in Shower: Effective Solutions and Tips:Read the full guide
Authoritative Planning References
International Code Council I-Codes - Use this as a starting point for code families, then verify the code edition adopted by the local building department.
DOE Energy Saver Lighting Design - Practical guidance for efficient indoor and outdoor lighting layers, controls, glare reduction, and fixture placement.
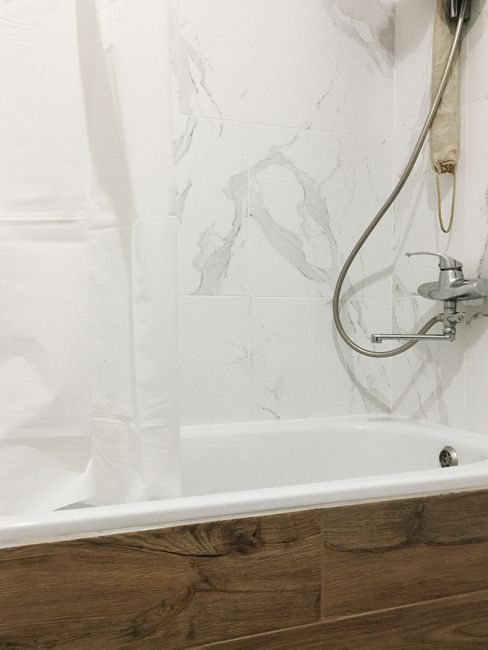
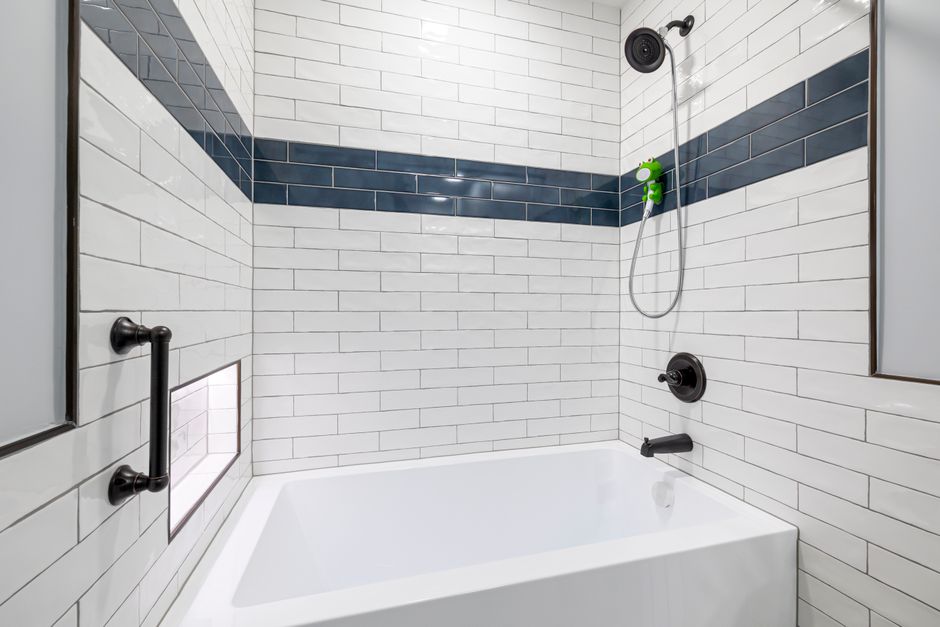
Close-up of a minimalist bathroom featuring a modern bathtub and chrome faucet against tiled walls.Sleek, minimalist bathroom with white and blue tiles and contemporary fixtures.Vintage white bathtub in a cozy garden setup with lush potted plants and wooden floor.
Want your brand featured on Architecture Adrenaline?
Justin Ankus is a designer, ceramicist, and digital media entrepreneur with a degree in architecture from the Illinois Institute of Technology in Chicago. He is the founder of JJ Clay Studio and the creator of Architecture Adrenaline, where he explores architecture, interiors, real estate, design, and creative living. His work blends architectural thinking, visual storytelling, automation, and hands-on making, with a focus on turning creative ideas into tangible projects across web, clay, and built environments.
Immerse yourself in architecture’s most boundary-pushing ideas—where innovative home improvements meet visionary urban developments. Discover new building techniques, materials, and creative concepts that are redefining how we shape our spaces on a global scale.