Drywall cracks are a reality we all face, whether in newly built homes or well-loved spaces. They might start as innocent hairline fractures or grow into more ominous splits that beg for attention. But here’s the truth: fixing drywall cracks isn’t just about aesthetics—it’s about maintaining your home's structural integrity. Let’s break it down step by step so you can handle those pesky cracks like a pro.
Understanding what causes drywall cracks is key to preventing them in the future. Common culprits include:
Before you reach for a repair kit, assess the cause. Fixing a crack without addressing the root problem could mean you’re setting up for more repairs down the line.
Before you dive in, gather these essentials:
Having everything on hand will make the process smoother and help you achieve a professional-looking finish.
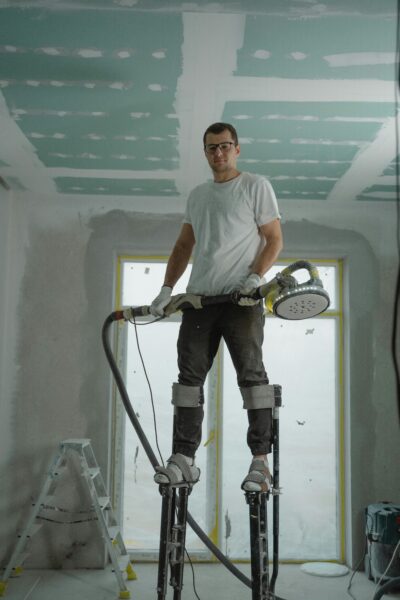
Good prep work can make or break (pun intended!) your repair.
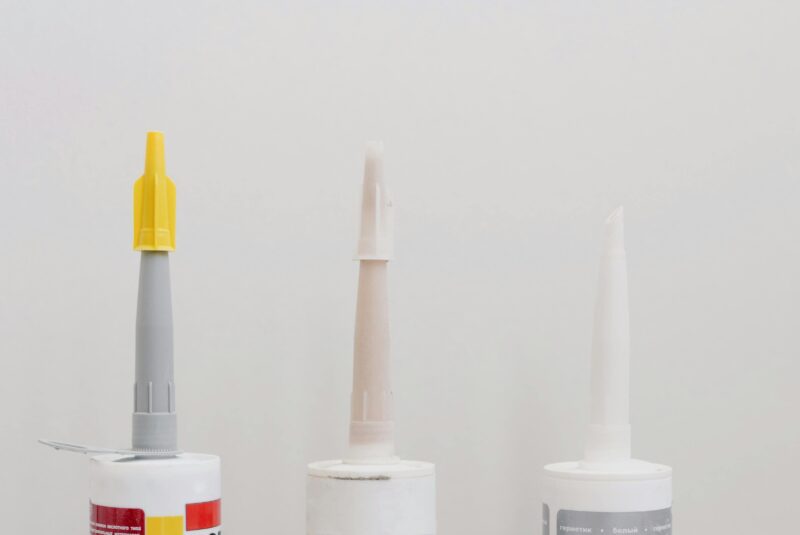
For cracks wider than a hairline, you’ll want to use drywall tape.
Hairline cracks are easier—and less messy—to fix using paintable latex caulk.
Once the joint compound dries, gently sand the area for a seamless appearance. Always smooth out the surface to match the texture of your wall. Dust-control joint compound can simplify cleanup here, leaving less mess to deal with.
Primer is essential to prevent the repaired area from showing through the final coat of paint. Once primed, apply the paint, ensuring consistent strokes to make the repair blend perfectly into the wall.
Here’s a handy table comparing approaches for different crack types:
| Crack Type | Best Repair Method | Level of Effort |
|---|---|---|
| Hairline Cracks | Paintable latex caulk | Low |
| Moderate Cracks | Joint compound + drywall tape | Moderate |
| Deep/Wide Cracks | Joint compound layered in stages | High |
Got a big project ahead? A little prep goes a long way in making the job cleaner, faster, and safer.
Still staring at that crack in your wall, wondering if this is a weekend task or a call-the-pro moment? Share your thoughts or questions in the comments below! Or, if you've tackled a stubborn drywall crack before, let us know your favorite hacks to make the job easier. Everyone loves a good DIY tip!
UNRUNFO-Drywall-Corner-Tape-Self-Adhesive/dp/B0DCP3PTQP

Drywall-Repair-Kit-Hole-Patch/dp/B0D54Q2NPF
MARSHALLTOWN-TR664-Drywall-Tape-Reel/dp/B000GAS1F0
We hope you feel empowered to tackle those drywall cracks with confidence after following our guide! Remember, keeping your home in top shape is an ongoing journey, and we're here to help every step of the way. For more inspiration and in-depth DIY tips, follow us on Pinterest for a plethora of creative ideas. Want to see our latest projects and behind-the-scenes action? Check out our Instagram page for exciting updates. We’d also love to chat and hear about your home improvement stories—come join the conversation on X (formerly Twitter) or connect with us on Facebook. Let's build and create beautiful spaces together!
While you can temporarily patch drywall cracks using a thinned joint compound or caulk, these solutions are not long-lasting. For a durable repair, tape the crack with paper tape, which reinforces the area and prevents the crack from returning.
To fix hairline cracks, use a spackle or patching compound applied with a putty knife. Wipe away excess gently with a damp paper towel or sponge, taking care not to remove the compound from the crack. Let it dry fully, and apply additional compound if necessary. With careful wiping, sanding is not needed.
Consider the following options:
- For Small Cracks (less than 1/8 inch):
- Acrylic Caulk: Known for being flexible and easy to apply, it adheres well to drywall and can be painted.
- Spackling Compound: Lightweight and easy to sand, it's perfect for tiny cracks.
- For Medium Cracks (1/8 inch to 1/4 inch):
- Consider more robust fillers as needed.
For larger problems in drywall, mud offers more durable repair than caulk. While caulk is suitable for minor fixes and sealing, drywall mud excels in finishing and repairing larger areas. When you are looking to repair or finish drywall, drywall mud is likely the superior option.
{"@context":"https://schema.org","@type":"BlogPosting","headline":"How to Fix a Crack in Drywall Like a Pro","url":"https://www.architectureadrenaline.com/how-to-fix-a-crack-in-drywall-like-a-pro/","datePublished":"2025-01-03T05:09:00-08:00","dateModified":"2026-05-15T18:08:23-07:00","author":{"@type":"Person","name":"JJ","sameAs":["https://www.linkedin.com/in/architectureadrenaline/","https://twitter.com/archiadrenaline"]},"image":{"@type":"ImageObject","url":"https://www.architectureadrenaline.com/wp-content/uploads/2025/01/pexels-photo-6473977-400x600-1.jpg","width":1200,"height":630},"publisher":{"@type":"Organization","name":"Architecture Adrenaline","logo":{"@type":"ImageObject","url":"https://architectureadrenaline.com/wp-content/uploads/logo.png"}},"breadcrumb":{"@type":"BreadcrumbList","itemListElement":[{"@type":"ListItem","position":1,"name":"Home","item":"https://architectureadrenaline.com/"},{"@type":"ListItem","position":2,"name":"How to Fix a Crack in Drywall Like a Pro","item":"https://www.architectureadrenaline.com/how-to-fix-a-crack-in-drywall-like-a-pro/"}]},"mainEntityOfPage":{"@type":"WebPage","@id":"https://www.architectureadrenaline.com/how-to-fix-a-crack-in-drywall-like-a-pro/"}}
{"@context":"https://schema.org","@type":"FAQPage","mainEntity":[{"@type":"Question","name":"How to Fix a Crack in Drywall: A Guide to Smooth, Lasting RepairsnnnnDrywall cracks are a reality we all face, whether in newly built homes or well-loved spaces. They might start as innocent hairline fractures or grow into more ominous splits that beg for attention. But here’s the truth: fixing drywall cracks isn’t just about aesthetics—it’s about maintaining your home's structural integrity. Let’s break it down step by step so you can handle those pesky cracks like a pro.nnWhy Do Drywall Cracks Happen?","acceptedAnswer":{"@type":"Answer","text":"Understanding what causes drywall cracks is key to preventing them in the future. Common culprits include:"}},{"@type":"Question","name":"Materials You’ll Need","acceptedAnswer":{"@type":"Answer","text":"Before you dive in, gather these essentials:"}},{"@type":"Question","name":"How to Fix Drywall CracksnnnnStep 1: Prep the AreanGood prep work can make or break (pun intended!) your repair.nn Clean the crack using a utility knife to remove flaking or loose material.n Look closely to check if the crack is superficial or goes deeper. Deep cracks may require additional stabilization before repair.n If sanding is required, wear a mask or breathing protection to avoid inhaling dust.nnnStep 2: Apply Tape for Larger CracksnFor cracks wider than a hairline, you’ll want to use drywall tape.nn Lay a strip of tape over the crack, pressing it down gently.n Use a putty knife to apply joint compound over and around the tape. Feather the edges to blend with the wall.n Allow it to dry completely before applying additional layers, if needed.nnnStep 3: Small Cracks? Caulk Is Your Best FriendnHairline cracks are easier—and less messy—to fix using paintable latex caulk.nn Apply a thin bead of caulk along the crack.n Use your finger or a damp cloth to smooth it into the crack.n Wipe off any excess with a sponge or rag.n Paint over the area. If your walls are painted with flat paint, the repair will disappear like magic!nnnStep 4: Sand for a Smooth FinishnOnce the joint compound dries, gently sand the area for a seamless appearance. Always smooth out the surface to match the texture of your wall. Dust-control joint compound can simplify cleanup here, leaving less mess to deal with.nnStep 5: Prime and PaintnPrimer is essential to prevent the repaired area from showing through the final coat of paint. Once primed, apply the paint, ensuring consistent strokes to make the repair blend perfectly into the wall.nnQuick Reference Repair Methods","acceptedAnswer":{"@type":"Answer","text":"Here’s a handy table comparing approaches for different crack types:"}},{"@type":"Question","name":"Safety Tips to Keep in Mindnn Invest in a good-quality dust mask, especially when sanding. The fine particles from joint compound can irritate your lungs.n Protect your workspace by hanging plastic sheeting to prevent dust from spreading.nnGot a big project ahead? A little prep goes a long way in making the job cleaner, faster, and safer.nnOver to You!","acceptedAnswer":{"@type":"Answer","text":"Still staring at that crack in your wall, wondering if this is a weekend task or a call-the-pro moment? Share your thoughts or questions in the comments below! Or, if you've tackled a stubborn drywall crack before, let us know your favorite hacks to make the job easier. Everyone loves a good DIY tip!"}}]}


Immerse yourself in architecture’s most boundary-pushing ideas—where innovative home improvements meet visionary urban developments. Discover new building techniques, materials, and creative concepts that are redefining how we shape our spaces on a global scale.
