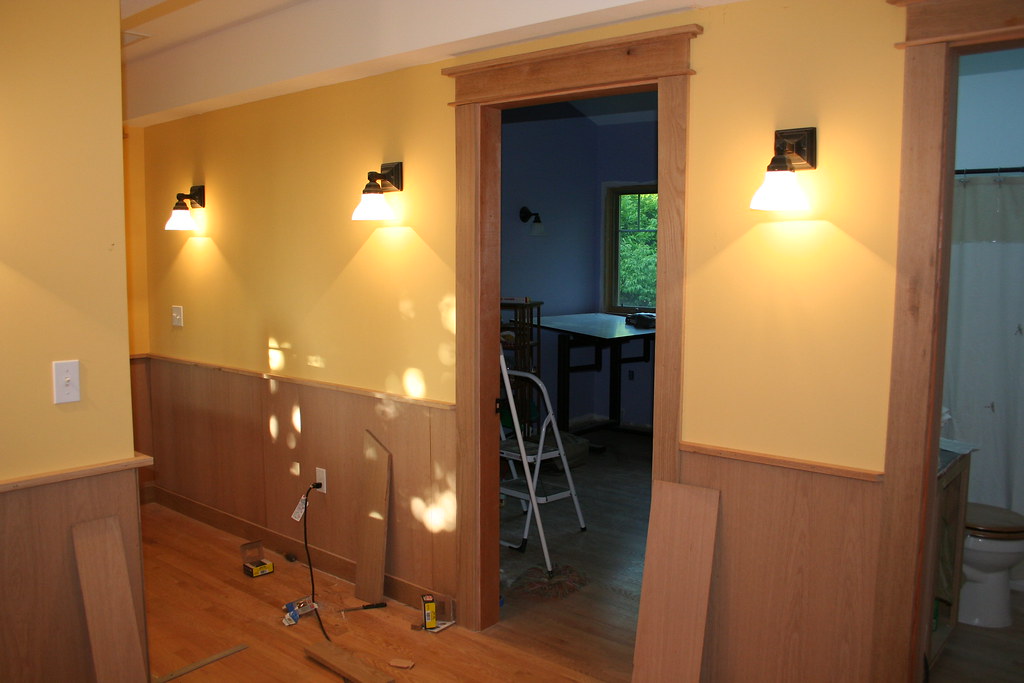
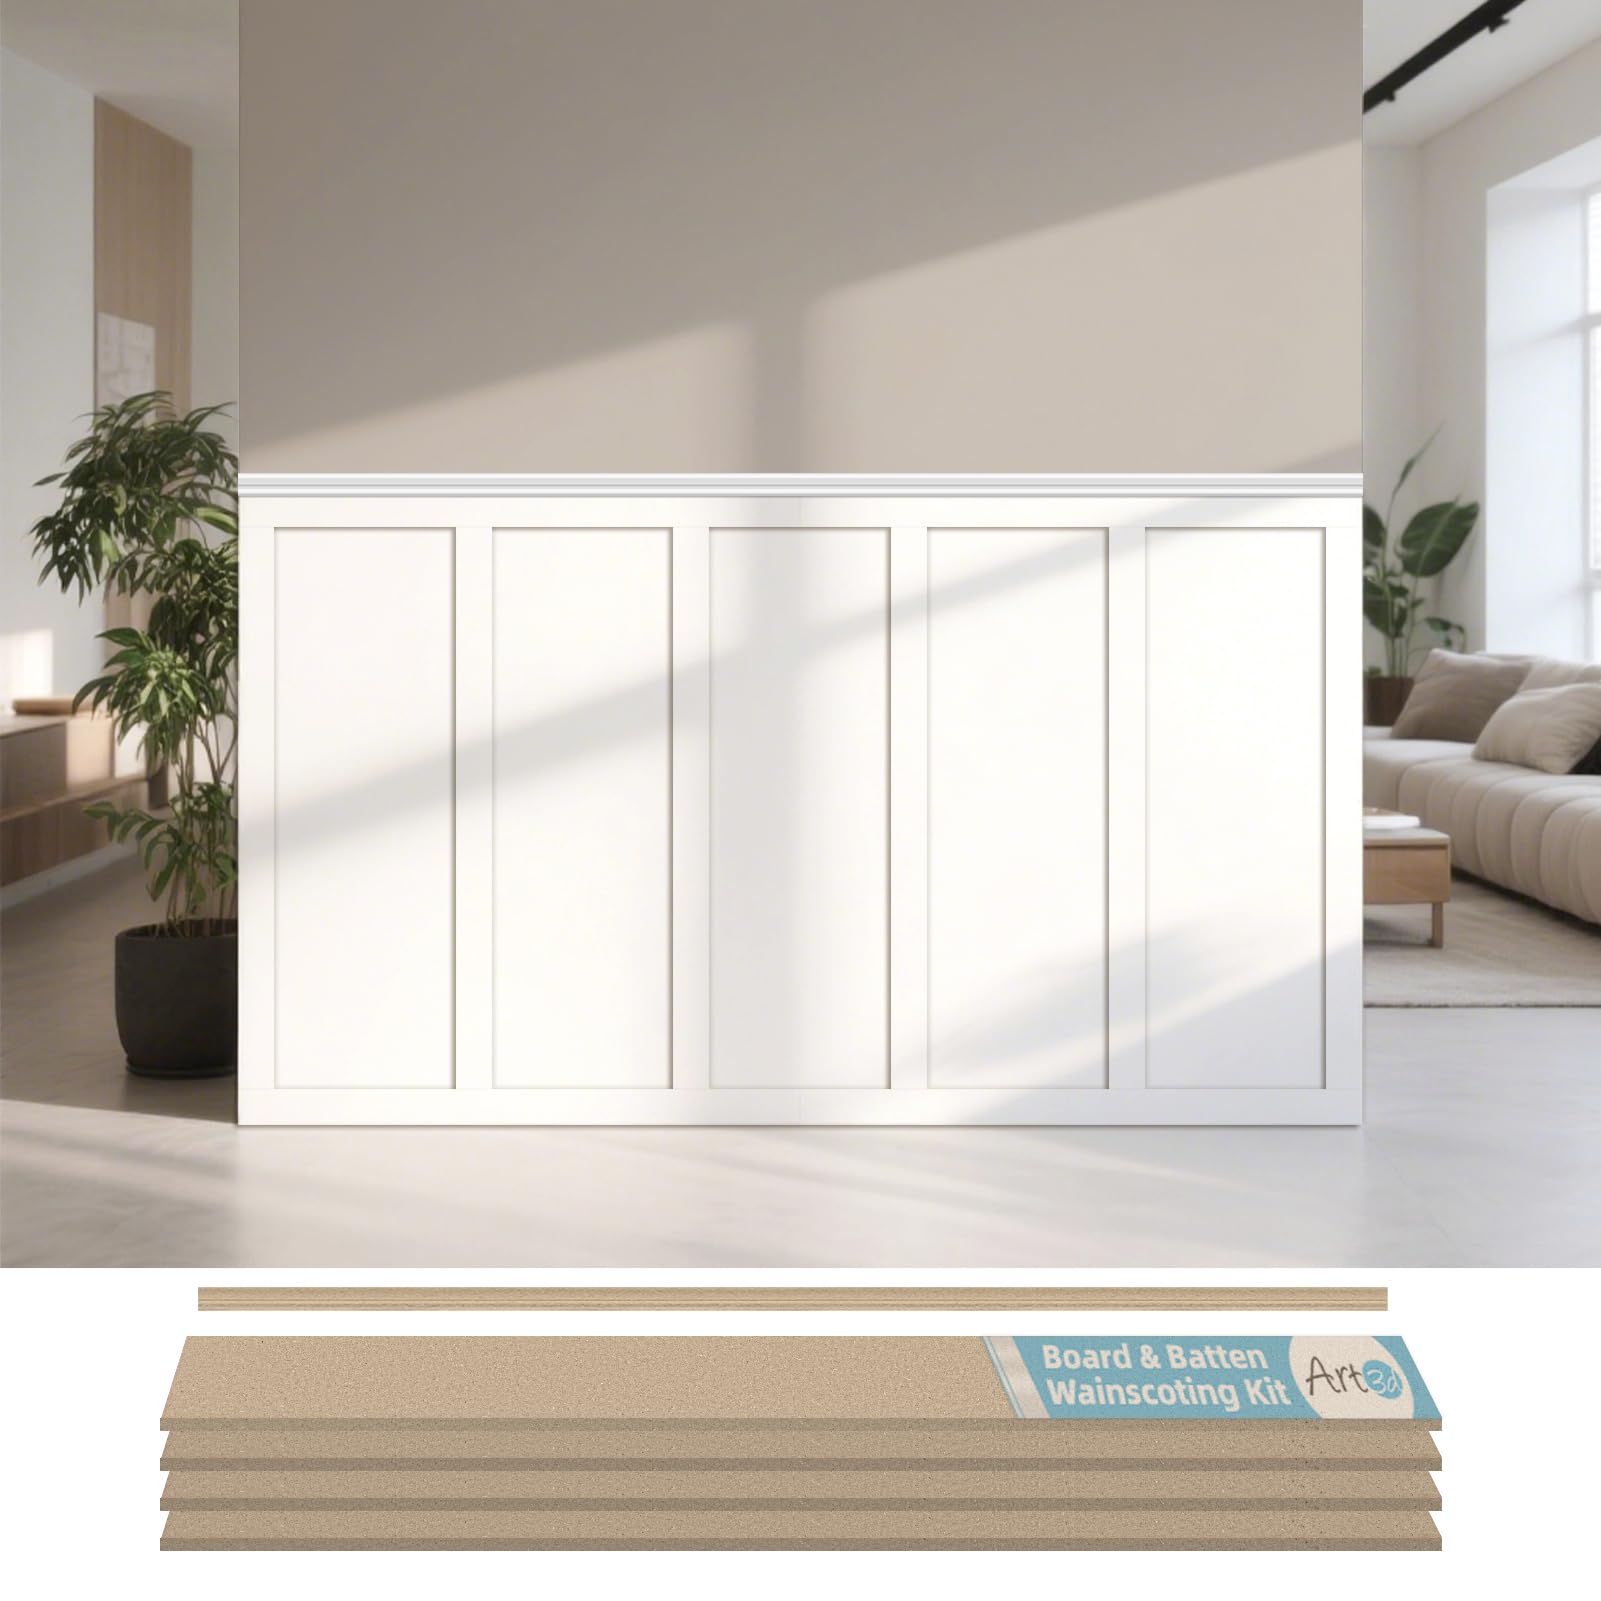
Learn how to install wainscoting over drywall and transform your space with charm. Discover techniques for a polished look today!
How to install wainscoting over drywall
Installing wainscoting over drywall can transform a room by adding architectural charm, durability, and a polished finish. This guide walks you through the process with practical steps, material choices, and tips to help you achieve professional results without a full renovation. Wainscoting falls under the broader category of panelling, including beadboard, shiplap, and raised panels, and can be crafted from timber or MDF to suit traditional or modern aesthetics.
Step
Description
Tips
1. Prepare Wall
Ensure the drywall is clean and free of obstructions; repair any gouges or imperfections as needed.
Use a level to check for evenness and address high/low spots before starting.
2. Plan Layout
Measure the room and mark where rails and panels will be installed; establish a bottom rail height.
Consider laser level or plumb line for precise vertical alignment.
3. Install Panels
Attach bottom rail to establish the base line, then place panels and battens as planned.
Apply construction adhesive for a secure hold; use finish nails as needed and countersink them.
Installing wainscoting over drywall can transform a space with architectural charm, and learning how to install wainscoting over drywall empowers you to achieve a polished, durable finish without a full renovation. This type of wall treatment falls under the broader category of panelling, which includes various techniques and styles, such as beadboard, shiplap, and raised panels, made from different materials.
Preparing Your Walls
Drywall installation on the 4th floor "Drywall installation on the 4th floor" by Marquette University is licensed under CC BY-NC-ND 2.0. To view a copy of this license, visit https://creativecommons.org/licenses/by-nc-nd/2.0/.DURING- Framing complete and all drywall installed "DURING- Framing complete and all drywall installed" by NLT CONSTRUCTION is licensed under CC BY-NC-SA 2.0. To view a copy of this license, visit https://creativecommons.org/licenses/by-nc-sa/2.0/.Drywall installation in unidentified home "Drywall installation in unidentified home" by Boston City Archives is licensed under CC BY 2.0. To view a copy of this license, visit https://creativecommons.org/licenses/by/2.0/.
Installing wainscoting over drywall can transform a space with architectural charm, and learning how to install wainscoting over drywall empowers you to achieve a polished, durable finish without a full renovation. This type of wall treatment falls under the broader category of panelling, which includes various techniques and styles, such as beadboard, shiplap, and raised panels, made from different materials.
Step
What to Do
Tips
Prepare wall
Clean the drywall surface and remove dust, grease, or flaking paint. Repair any gouges or imperfections as needed.
Run a level along the wall to check for high or low spots and address them before starting.
Plan layout
Measure the room and determine the height of the wainscoting and position of rails and panels. Mark vertical registrations for panel alignment.
Use a laser level or plumb line for precise vertical alignment.
Install bottom rail
Attach a durable bottom rail to establish the base line for panels. Ensure it is level and firmly fastened.
Offset any stud location by using a backing board or shims if needed.
Fit panels
Apply adhesive to the back of each panel and press into place, aligning with the rails and markings.
Leave small gaps at panel edges to accommodate expansion; use finish nails or small brads as required.
Top rail and trim
Attach the top rail once all panels are in place, then install vertical battens or decorative trim as desired.
Profile choices (flush, bead, or raised) influence the final look; ensure trim sits snugly against walls and panel edges.
Choosing Wainscoting Styles
wainscoting on stairs "wainscoting on stairs" by The Finishing Company Richmond Va is licensed under CC BY 2.0. To view a copy of this license, visit https://creativecommons.org/licenses/by/2.0/.wainscoting on walls "wainscoting on walls" by The Finishing Company Richmond Va is licensed under CC BY 2.0. To view a copy of this license, visit https://creativecommons.org/licenses/by/2.0/.wainscoting ideas "wainscoting ideas" by The Finishing Company Richmond Va is licensed under CC BY 2.0. To view a copy of this license, visit https://creativecommons.org/licenses/by/2.0/.Wainscoting the Hallway "Wainscoting the Hallway" by Greg_e is licensed under CC BY-NC-SA 2.0. To view a copy of this license, visit https://creativecommons.org/licenses/by-nc-sa/2.0/.Shadow box wainscoting "Shadow box wainscoting" by The Finishing Company Richmond Va is licensed under CC BY 2.0. To view a copy of this license, visit https://creativecommons.org/licenses/by/2.0/.
Installation Process
Drywall Installation Bedroom "Drywall Installation Bedroom" by OlgerFallasPainting is licensed under CC BY-SA 2.0. To view a copy of this license, visit https://creativecommons.org/licenses/by-sa/2.0/.Drywall Installation "Drywall Installation" by OlgerFallasPainting is licensed under CC BY-SA 2.0. To view a copy of this license, visit https://creativecommons.org/licenses/by-sa/2.0/.
Wainscoting over drywall creates a durable, stylish wall treatment that protects the lower portion of walls and reduces stray dents and scuffs in high-traffic areas. It works well in traditional and contemporary spaces, offering an instantly refined look without a full wall rebuild. If you’re sourcing materials, consider timber mouldings from reputable suppliers who offer ready-made panels, rails, and trims in various profiles to suit your style.
Why install wainscoting over drywall
Wainscoting over drywall creates a durable, stylish wall treatment that protects the lower portion of walls and reduces stray dents and scuffs in high-traffic areas. It works well in traditional and contemporary spaces, offering an instantly refined look without a full wall rebuild. If you’re sourcing materials, consider timber mouldings from reputable suppliers who offer ready-made panels, rails, and trims in various profiles to suit your style.
Tools, materials, and preparation
Wainscot panels or boards (timber or MDF, depending on your preference)
Bottom rail and top rail (pre-cut to room width)
Panel supports or battens (for extra rigidity)
Construction adhesive suitable for wood-to-drywall
Finish nails or brads and a nail set
Level, laser level (optional but recommended), tape measure, pencils
Stud finder, drywall screws, and backing for screw attachment if needed
Caulk, wood filler, sandpaper, and paint or stain finish
Protective gear (safety glasses, ear protection)
Step-by-Step Installation Process
Now that you have your tools and materials ready, let’s walk through the key steps to achieve a flawless wainscoting installation:
Acclimate materials: If you’re using solid timber mouldings, allow them to acclimate in the room for 24–48 hours to minimize movement after installation. This helps prevent warping or gaps later on.
Set a reference line: Use a level and a marking line to establish the bottom rail height. A common height is around 32 inches from the floor, but adjust to suit your room’s proportions and preference.
Attach the bottom rail: Apply a continuous bead of construction adhesive to the back of the bottom rail and press it firmly against the wall along the marked line. Secure with nails into studs or use wall anchors where necessary. Ensure the rail is perfectly level.
Prepare panels and battens: If panels require battens for support, cut them to width and prime/finish as needed. Dry-fit a panel in place to confirm fit before applying adhesive.
Install the panels: Starting from a corner or the center, apply adhesive to the back of each panel and position it against the bottom rail and adjacent panels. Tap gently with a mallet to seat fully. Use minimum nails only to avoid splitting; countersink nails slightly and seal with wood filler if desired.
Seal around obstacles: When the wall has outlets, switches, or architraves, trim panels to fit with a sharp utility knife or saw, leaving a small gap for movement. Use a flexible caulk to seal gaps around irregular shapes.
Install the top rail and trim: Once all panels are in place, install the top rail along the upper edge of the wainscoting. Add any decorative trim or mouldings to neatly finish edges and cover gaps. Ensure the top rail is level for a clean look.
Finish: Lightly sand any rough spots, fill nail holes with wood filler, and touch up with primer and paint or stain to match your chosen finish.
Practical tips for a flawless finish
Allow for seasonal movement in timber by providing small expansion gaps where panels meet rails.
Use a laser level to guarantee straight lines for both rails and panel grout lines.
Acclimate timber to the room’s humidity level to reduce post-installation changes.
Consider pre-primed or pre-finished panels to reduce on-site finishing time.
If you’re unsure about cutting to fit around irregular features, use a flexible trim option or custom-milled profiles for a seamless look.
Choosing the right materials and suppliers
Look for timber mouldings and wainscoting kits from reputable manufacturers who offer a range of profiles, in-stock items, and timber options. Some suppliers provide online ordering, samples, and a Build Your Quote tool to help you plan and price your project. When selecting materials, consider the room’s humidity, the desired level of finish, and whether you prefer a traditional or modern aesthetic. A quality bottom rail and properly aligned panels will ensure your wainscoting remains stable and visually appealing for years to come.
Ready to start? Gather your measurements, choose your profiles, and begin planning your wainscoting project. If you’ve used wainscoting in a recent reno, share your tips or questions in the comments—your experience could help someone else achieve a polished result.
Why Wainscoting Enhances Your Space
Wainscoting isn’t just a decorative choice; it’s a functional enhancement that provides both style and protection for your walls. By installing wainscoting over drywall, you’re creating a barrier against everyday wear and tear, especially in high-traffic areas like hallways or dining rooms. With its elegant profiles, wainscoting adds an instant touch of sophistication, effortlessly bridging timeless elegance with modern functionality.
Essential Tools and Materials for Your Project
Wainscot panels or boards (select based on preference and usage)
Durable bottom and top rails
Battens or panel supports for added stability
Construction adhesive suitable for drywall
Finish nails or brads
A level, laser level (highly recommended), and measuring tape
Protective gear (like safety glasses)
Caulk and wood filler for finishing touches
Sandpaper for smoothing rough spots
Step-by-Step Installation Process
Now that you have your tools and materials ready, let’s walk through the key steps to achieve a flawless wainscoting installation:
Acclimate Your Materials: If you’re using real wood, allow it to adjust to your home’s humidity for 24–48 hours. This helps minimize post-installation warping.
Establish Your Reference Line: Use a level to mark where your bottom rail will be positioned. A popular choice is around 32 inches from the floor, but adjust as needed to fit your room's proportions.
Attach the Bottom Rail: Apply a continuous line of construction adhesive to the back of the bottom rail and place it firmly against the wall. Secure it with nails, ensuring it's perfectly level for a clean start.
Prepare and Test Fit Panels: Before sticking each panel down, dry-fit them to ensure consistency in the fit. This step saves you from surprises once the adhesive is applied.
Install Panels: Starting from a corner or the middle, adhere each panel, tapping lightly to secure it. Remember to use nails sparingly to avoid splitting the wood.
Trim Around Obstacles: For any outlets or features protruding from the wall, meticulously cut the panels so they fit perfectly around them. A small gap for flexibility is ideal.
Finalize with Top Rail and Trim: Once your panels are in place, attach the top rail and any decorative trim. A snug fit here keeps the overall look polished and professional.
Finish Touches: Sand down any rough edges, fill nail holes with wood filler, and paint or stain the panels for a stunning final look.
Tips for a Flawless Installation
Allow for small expansion gaps in timber to accommodate seasonal changes.
Use a laser level for impeccably straight lines during installation.
Choose pre-primed materials to save time on-site.
Explore flexible trim options for tricky shaping around archways or baseboards.
Selecting Quality Materials and Suppliers
Finding the right materials is essential for a stellar wainscoting project. Opt for suppliers that offer a wide range of timber mouldings and wainscoting kits, ensuring you find the perfect match for your style. Look for in-stock profiles, samples, and reliable customer support to help you plan quantities accurately. Whether you prefer timeless charm or contemporary flair, choosing quality materials will yield satisfying results.
Eager to start your wainscoting journey? Share your thoughts or experiences in the comments—what design styles are you considering, or what challenges have you faced in past projects? Your insights could spark a great discussion!
What design ideas are you weighing for your space, and which profile do you think best fits your style—timber warmth or modern MDF elegance?
If you wish to explore more about the different meanings of "wainscot," you can visit the Wainscot (disambiguation) page for further information.
If you're looking to purchase wainscoting materials, check out this Amazon search for wainscoting to compare options and prices.
Installing wainscoting over drywall can seem like a daunting task at first, but with a little patience and the right tools, you'll find that it’s entirely manageable. Remember to take your time, measure twice, and carefully cut your panels to ensure a perfect fit. Adding wainscoting not only enhances the beauty of your space but also can elevate the overall vibe of your home, making it feel more inviting and polished. Just imagine how rewarding it will be to see that finished look and know you did it yourself!
Frequently Asked Questions
Do I need a top rail for wainscoting over drywall? A top rail provides a finished look and helps keep panels aligned. It’s commonly used, but you can opt for alternative trims if your design calls for it.
Can I install wainscoting directly over painted drywall? Yes. Clean the surface, scuff lightly to improve adhesion, and use a high-quality construction adhesive with appropriate fasteners.
What thickness should wainscoting be? Typical panels range from 1/4" to 3/4" (6 mm to 19 mm). Choose based on style preference and structural needs.
How long does installation take? A small to medium room might take a weekend, depending on your experience and room features.
What maintenance is required after installation? Light sanding and repainting or staining as needed; address any gaps or movement with caulk or filler.
Stay connected for more inspiration!
Ready to tackle your wainscoting project? If you’d like more design ideas or tips, follow us on Instagram. We love connecting with DIY enthusiasts and hearing about your home improvement journeys. Share your results and questions in the comments—we’re excited to see your transformations!
Art3d Pre-Cut Wall Molding Set of 6 pcs, Ready-to-Assemble Wainscoting Panels for Interior Wall Décor Living Room Bedroom Accent Wall - Installed with Glue, 3 Top 3 Bottom
Art3d Premade Board and Batten Paintable Wainscoting Kit, MDF Accent Wall Panel for Kitchen Bedroom Living Room Home Decor Covers 189 x 54 in. Molding Trim Slat with Edge Strip
Justin Ankus is a designer, ceramicist, and digital media entrepreneur with a degree in architecture from the Illinois Institute of Technology in Chicago. He is the founder of JJ Clay Studio and the creator of Architecture Adrenaline, where he explores architecture, interiors, real estate, design, and creative living. His work blends architectural thinking, visual storytelling, automation, and hands-on making, with a focus on turning creative ideas into tangible projects across web, clay, and built environments.
Immerse yourself in architecture’s most boundary-pushing ideas where innovative home improvements meet visionary urban developments. Discover new building techniques, materials, and creative concepts that are redefining how we shape our spaces on a global scale.