
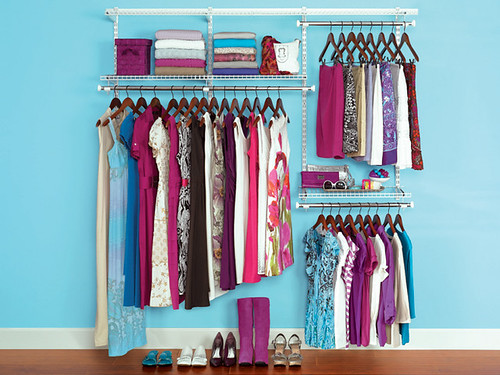
Installing a closet rod is one of the simplest yet most impactful ways to enhance your closet’s functionality and style. Whether you’re a homeowner refreshing your storage or a remodeler looking for efficient solutions, this guide walks you through everything you need to know. From selecting the right materials based on your closet’s design to step-by-step installation techniques, you will learn how to securely mount a closet rod that supports your wardrobe and complements your space. Let’s dive into the practical details to help you create an organized, stylish closet that works for you.
Before You Start
A closet rod provides the foundation for hanging clothes efficiently and neatly. Choosing the right rod material—wood, metal, or chrome—affects both durability and aesthetics. Proper installation ensures stability and maximizes closet space. This guide covers measuring your closet, selecting brackets and rods, marking and drilling for secure mounts, and tips for styling your closet to blend function with design. By the end, you’ll have a strong, visually appealing closet rod installed that supports your daily routine and elevates your interior space.
⚠️ Safety First
- Wear safety glasses when drilling or cutting rods.
- Use a stud finder to avoid drilling into electrical wiring or plumbing.
- Ensure ladder or step stool is stable if working at height.
- Keep tools and materials organized to prevent accidents.
🛠 What You'll Need for How To Install A Closet Rod
Materials
- Closet Rod — supports hanging clothes; choose material and length based on closet width
- Rod Brackets — secure the rod to the wall, provide stability
- Wall Anchors — ensure strong mounting in drywall or plaster
- Wood Screws — attach brackets to studs or anchors
Tools
- Measuring Tape — for precise measurements of closet width and bracket placement
- Level — ensures rod is installed perfectly horizontal
- Drill and Drill Bits — for pilot holes and securing screws
- Screwdriver — to tighten screws securely
- Stud Finder — locates wall studs for secure mounting
- Pencil — marks bracket placement
Step-by-Step Instructions
Step 1 Measure Your Closet Width ~15 min
Use a measuring tape to measure the exact width of your closet where you want to install the rod. Subtract about 1 inch to allow for the brackets on each side, ensuring a proper fit. Record this measurement carefully.
💡 Pro Tip: Double-check measurements to avoid purchasing an incorrectly sized rod.
Step 2 Select Your Rod and Brackets ~20 min
Choose a closet rod material that fits your style and weight requirements. Popular options include solid wood for warmth or chrome metal for a sleek look. Select brackets designed to support the rod length and weight.
💡 Pro Tip: Consider rods with a diameter of 1 to 1.25 inches for standard hangers.
Step 3 Locate Wall Studs and Mark Bracket Positions ~25 min
Use a stud finder to locate studs on both sides of the closet walls. Mark the bracket positions about 66 inches from the floor, which is a standard rod height. If studs are not available, plan to use wall anchors.
💡 Pro Tip: Ensure bracket marks are level and aligned for a balanced rod installation.
Step 4 Drill Pilot Holes and Insert Wall Anchors ~30 min
Drill pilot holes at your marked bracket locations. If mounting into drywall without studs, insert appropriate wall anchors to provide secure support for the screws.
💡 Pro Tip: Use anchors rated for at least 50 lbs to safely support clothing weight.
Step 5 Attach Brackets to the Wall ~30 min
Secure the brackets with screws into the pilot holes or wall anchors. Use a level to confirm brackets remain perfectly horizontal before fully tightening the screws.
💡 Pro Tip: Pre-tighten screws, check alignment, then fully tighten for best results.
Step 6 Cut Rod to Size if Necessary ~20 min
If your closet rod is longer than needed, use a hacksaw to cut it down to the measured length. Smooth any rough edges with sandpaper or a metal file to prevent snags on clothes.
💡 Pro Tip: Wear safety glasses when cutting metal rods.
Step 7 Install the Closet Rod ~15 min
Place the rod into the installed brackets, ensuring it fits snugly and is level. Test the rod’s stability by gently pressing down and hanging a few garments.
💡 Pro Tip: If the rod feels loose, check bracket screws and tighten as needed.
💡 Pro Tips & Expert Advice
- Use double brackets for rods longer than 48 inches to prevent sagging.
- Consider adjustable brackets for flexibility in rod height.
- Choose rods with a smooth finish to prevent clothing damage.
- For heavy garments, opt for metal rods with solid mounting hardware.
Frequently Asked Questions
- Q: What is the best height to install a closet rod?
- A: The standard height is about 66 inches from the floor, allowing enough space for hanging clothes without dragging.
- Q: Can I install a closet rod without wall studs?
- A: Yes, use heavy-duty wall anchors designed for drywall to securely mount the brackets.
- Q: What diameter rod is best for durability?
- A: A rod between 1 and 1.25 inches in diameter offers good strength and works well with most hangers.
- Q: How do I prevent the rod from sagging over time?
- A: Use sturdy brackets and add a center support bracket for rods longer than 48 inches.
- Q: Can I paint or stain a wooden closet rod?
- A: Yes, use smooth sanding and a durable finish like polyurethane for a lasting surface.
Installing a closet rod is a straightforward project that can dramatically improve your closet’s organization and aesthetic. By carefully measuring, selecting quality materials, and following these practical steps, you’ll create a durable, stylish rod tailored to your space. Remember to prioritize secure mounting and proper alignment for long-lasting performance. With your new closet rod in place, enjoy a more functional and visually pleasing storage area that supports your daily routine and design vision.
Helpful Tools and Materials
Architecture Adrenaline may earn a commission from qualifying purchases. Use this as a shopping checklist and verify sizes, colors, and compatibility before buying.
- Penetrating grout sealerThe core material for protecting grout lines from moisture and stains.
- Grout sealer applicator bottleApplies sealer directly on grout without flooding the tile face.
- Stiff grout brushHelps clean residue out of grout before sealing.
- Tile and grout cleanerUseful when the grout needs degreasing before sealer goes on.
- Nitrile glovesKeeps cleaner and sealer off your skin.
Installation References
Use these topic-specific sources to verify materials, prep, and installation decisions.
Research-Backed Planning Notes
- National Kitchen & Bath Association: Kitchen planning context for layout and finish decisions. Use this source to verify materials and sequence before publishing. Source: National Kitchen & Bath Association
- Backsplash surface prep matters: Substrate prep and installation method are core tile planning variables. Use this source to verify materials and sequence before publishing. Source: Backsplash surface prep matters
On Architecture Adrenaline
- How To Increase Natural Light In Your Home: Read the full guide
Authoritative Planning References
- Tile Council of North America - Industry reference point for tile installation methods and standards.
- Custom Building Products - Manufacturer guidance for adhesives, grout, and surface prep.
External Installation References
Extra Visual Inspiration
