When embarking on a DIY project like updating your home, knowing how to paint both sides of a door efficiently is invaluable. This task might sound straightforward, but ensuring a professional finish requires attention to detail and the right preparation. For those interested in mastering door painting, checking out mastering the art of painting interior doors can provide a lot of insights. From selecting the appropriate paint type to understanding the best techniques for application, each step contributes to a refreshed look and longevity for your newly painted doors. The following table provides a quick reference guide to essential tools and steps for your door-painting project.
| Step | Tools Required | Description |
|---|---|---|
| Preparation | Sandpaper, Cloth, Screwdriver | Remove the door from its hinges, clean the surface, and sand any imperfections. Learn more about this process for wooden fixtures with this guide on repairing wooden door frames. |
| Priming | Primer, Paintbrush, Roller | Apply a coat of primer to ensure an even base for paint application. |
| Painting | Paint, Paintbrush, Roller | Use even strokes for a smooth finish. Start with the panels and edges, then the flat surfaces. |
Painting both sides of a door can feel like a juggling act, balancing efficiency with achieving that flawless, smooth finish that makes your door pop. Think of it not just as applying a coat of paint, but as transforming a mundane utility into a statement piece that completes a room. As you embark on this transformation, here’s how to make sure every brush stroke counts.
Choosing Your Paint Type
Before the brush even touches the wood, selecting the right paint type is crucial. Water-based paints are praised for their easy clean-up and minimal odor, while oil-based paints offer a durable finish that's fantastic for areas high in foot traffic or where surfaces endure more wear and tear. Whichever you choose, ensure the paint is suitable for wood surfaces and matches your desired finish, whether glossy, matte, or somewhere in between.
The Art of Preparation
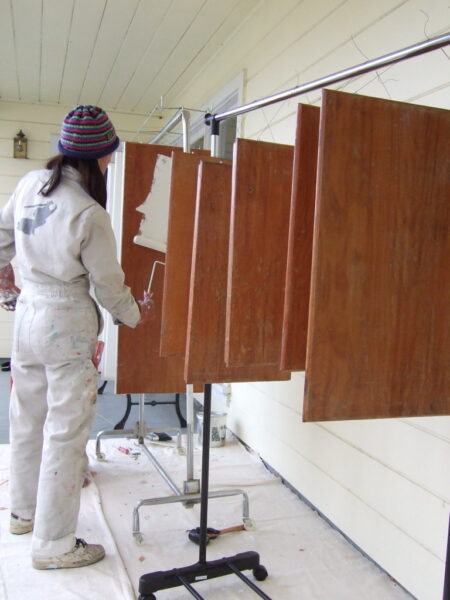
Preparation is your secret weapon for success. Skimping here can result in a finish that looks amateurish or won’t last. First, remove the door from its hinges, which allows for better access and easier handling. Clean the surface with a slightly dampened cloth to remove dust and grime. Sand imperfections with sandpaper, focusing on creating a smooth surface for the paint to adhere to.
Primer: Your Best Friend
You might be tempted to skip this step, but primer is essential for ensuring paint adheres evenly, providing a base that enhances durability and vibrancy. Use a paintbrush and roller to apply an even coat, paying close attention to corners and grooves often missed with a roller alone.
Mastering the Painting Technique
When it comes to the actual painting, a strategic approach saves time and patience. Start with the door panels and edges before moving on to the broader flat surfaces. This method prevents drips and allows for a more calculated application:
- Begin with the top panels, working your way down.
- Utilize long, even strokes with your brush for corners and detailed areas. Find more detailed painting techniques for various styles.
- Switch to a roller for large, flat sections to maintain a uniform finish.
For best results, apply two coats, allowing for adequate drying time between each application.
Let it Dry
Patience pays off when repainting doors. Ensure each coat dries completely before flipping the door to tackle the other side. This waiting period prevents smudges and ensures a smooth, even finish.
So, as you stand back to admire your refreshed door, think about the little steps that culminated in this transformation. If you've got tips or experiences from your own painting adventures, share them in the comments—your insights can be the key to unlocking someone else’s home improvement potential! For exterior projects, consider consulting an exterior house painting service for professional results.
Learn How to Paint Both Sides of a Door Efficiently
When embarking on a DIY project like updating your home, knowing how to paint both sides of a door efficiently is invaluable. This task might sound straightforward, but ensuring a professional finish requires attention to detail and the right preparation. To help you master this skill, Meyers Makes offers a comprehensive tutorial titled "Trick to paint both sides of a door" on YouTube. This video provides a step-by-step guide, complete with tips and techniques that will help you achieve a flawless finish on your next door-painting project.
After following the steps to paint both sides of your door, you'll feel a sense of accomplishment and newfound confidence in tackling DIY home projects. The transformation of a simple element like a door can breathe new life into your space, making your home feel refreshed and personalized. Remember, the key to achieving that professional finish is all about preparation—ensuring you have the right materials on hand, sanding surfaces smoothly, and applying paint evenly. You might even find this project unexpectedly fun and meditative, as painting allows you to get a little creative while bringing out the best in your home.
Stay Connected for More DIY Tips
As you continue your journey in home improvement, don't hesitate to share your progress and seek inspiration from the wider community. Exploring trends and techniques can be as simple as connecting with like-minded enthusiasts online. If you're looking for more creative ideas, or just want to showcase your newly painted doors to others, consider joining us on social media. We're always excited to see your results and share tips on how to transform your home. For more inspiration and a look into stylish architecture and design projects, follow along on our Instagram page. Happy painting!