Caulking your backsplash is a simple yet crucial task to keep your kitchen looking polished and prevent water damage. However, many homeowners struggle with uneven lines, cracking, or peeling caulk due to common mistakes. In this guide, you’ll learn how to caulk a backsplash without these issues, using straightforward, expert advice tailored for DIY enthusiasts. By following these steps, you’ll achieve a clean, durable seal that enhances your kitchen’s appearance and functionality.
Before You Start
Caulking a backsplash properly involves preparation, choosing the right materials, and applying the caulk with precision. This guide covers everything from surface cleaning to smoothing the caulk bead, including tips to avoid bubbles, gaps, and messy edges. You'll also find a detailed materials and tools list, estimated time and cost, and answers to common questions to help you complete your project confidently.
⚠️ Safety First
- Wear gloves to protect your skin from caulk chemicals.
- Ensure good ventilation when working with silicone caulk due to fumes.
- Use a utility knife carefully to avoid cuts or damage to tiles.
- Keep caulk and tools out of reach of children and pets.
🛠 What You'll Need for How To Caulk A Backsplash Without Common Mistakes 20260624 Unlp
Materials
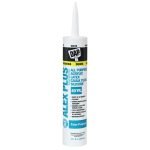
- Silicone or acrylic latex caulk — flexible, waterproof sealant ideal for kitchen backsplashes
- Painter’s tape — protects tile edges and ensures straight caulk lines
- Rubbing alcohol or mild cleaner — cleans the surface to promote adhesion
- Caulk smoothing tool or plastic spoon — helps create a smooth, even bead
- Paper towels or clean rags — for wiping excess caulk and cleaning up
Tools
- Caulking gun — ensures controlled, consistent caulk application
- Utility knife or scraper — removes old caulk and cleans grout lines
- Gloves — protects your hands from chemicals and mess
- Masking tape dispenser — speeds up tape application
Step-by-Step Instructions
Step 1 Remove Old Caulk and Clean the Surface ~45 min
Use a utility knife or scraper to carefully remove any old caulk from the backsplash joint. Avoid damaging tiles or grout. Once removed, clean the area with rubbing alcohol or a mild cleaner to eliminate grease, dirt, and soap residue. Let the surface dry completely before proceeding.
💡 Pro Tip: Work slowly to prevent tile damage. Use gloves to protect your hands.
Step 2 Apply Painter’s Tape for Clean Edges ~15 min
Apply painter’s tape along both sides of the backsplash joint to create crisp, straight lines for your caulk bead. Leave about 1/8 inch space where the caulk will go. Press tape edges firmly to prevent caulk from seeping underneath.
💡 Pro Tip: Use a tape dispenser for faster application. Double-check alignment before pressing down.
Step 3 Load the Caulking Gun and Cut the Nozzle ~10 min
Cut the caulk tube nozzle at a 45-degree angle to create an opening about 1/8 inch wide, suitable for backsplash joints. Load the tube into the caulking gun and depress the trigger slowly to test the flow on a scrap surface.
💡 Pro Tip: Start with a smaller hole; you can always cut more if needed.
Step 4 Apply the Caulk in a Continuous Bead ~20 min
Hold the gun at a 45-degree angle and apply steady pressure to lay a smooth, continuous bead along the joint. Move the gun slowly, about 1/4 inch per second, to avoid gaps or bubbles. Focus on maintaining an even bead thickness of about 1/8 inch.
💡 Pro Tip: Keep your hand steady and use slow, consistent movement.
Step 5 Smooth the Caulk Bead ~10 min
Immediately after application, dampen your finger or a caulk smoothing tool with water and gently smooth the bead in one continuous motion. Remove excess caulk and create a neat, concave finish. Avoid over-smoothing, which can cause gaps.
💡 Pro Tip: Use a wet rag nearby to clean your finger between passes.
Step 6 Remove Painter’s Tape and Let Caulk Cure ~5 min
Carefully peel off the painter’s tape while the caulk is still wet to avoid pulling dried caulk away. Allow the caulk to cure as per manufacturer instructions—usually 24 hours—before exposing it to water or cleaning.
💡 Pro Tip: Peel tape at a 45-degree angle away from the caulk line for best results.
💡 Pro Tips & Expert Advice
- Use 100% silicone caulk for waterproofing, or acrylic latex caulk for easier cleanup and paintability.
- Work in small sections if your backsplash is large to maintain wet edges for smoothing.
- Practice caulking on a scrap piece to perfect your bead before tackling the backsplash.
- Keep a damp rag handy to quickly clean mistakes before they dry.
- Check humidity and temperature; caulk cures best between 50°F and 80°F.
Frequently Asked Questions
- Q: Can I use any caulk for my backsplash?
- A: It's best to use either 100% silicone caulk for waterproofing or acrylic latex caulk if you plan to paint over it. Avoid general-purpose caulks that aren’t waterproof.
- Q: How long does caulk take to dry?
- A: Most caulks require 24 hours to cure fully before exposure to water or cleaning.
- Q: Why is my caulk peeling after a few weeks?
- A: Peeling often results from poor surface preparation or using the wrong type of caulk. Always clean thoroughly and use a caulk suited for kitchens.
- Q: How do I fix messy or uneven caulk lines?
- A: Use painter’s tape for straight edges and smooth the bead immediately after application with a damp finger or smoothing tool.
- Q: Can I paint over backsplash caulk?
- A: Only acrylic latex caulk can be painted. Silicone caulk remains flexible and cannot be painted.
Caulking your backsplash doesn’t have to be a frustrating task filled with errors. By following these clear, step-by-step instructions and avoiding common mistakes, you can achieve a neat, durable seal that enhances your kitchen’s look and protects your walls. Take your time with preparation, use the right materials, and practice smooth application to enjoy professional results. With this guide, you’re equipped to tackle backsplash caulking confidently and successfully.
Design Deep Dives & Resources
Use these references to go deeper on layouts, materials, lighting, safety, and maintenance decisions that matter for this style.
Research-Backed Planning Notes
On Architecture Adrenaline
- How To Increase Natural Light In Your Home: Read the full guide
Authoritative Planning References
External Inspiration
Editor-Selected Amazon Finds
Use these shopping starting points to compare dimensions, weather ratings, and reviews before buying.
How To Caulk A Backsplash Without Common Mistakes 20260624 Unlp lighting
Start with lighting because it changes how every finish reads.
How To Caulk A Backsplash Without Common Mistakes 20260624 Unlp storage
Keeps the space functional instead of just photogenic.
How To Caulk A Backsplash Without Common Mistakes 20260624 Unlp decor
Use restraint and repeat materials already in the room.
Extra Visual Inspiration